Prerequisites
On Gateway
- OpsRamp Classic Gateway(Linux) 14.0.0 and above.
- OpsRamp Nextgen Gateway 14.0.0 and above.
Note
OpsRamp recommends using the latest Gateway version for full coverage of recent bug fixes, enhancements, etc.prerequisites to be fulfilled on target cluster nodes / standalone nodes:
Starting from Windows Fail-over Cluster version 10.1.0, the option to select the connectionMode is available. The supported options are:
- PowerShell (existing)
- OpenSSH (new)
Note
PowerShell connection functionality will be deprecated in upcoming feature releases. It is recommended to migrate to OpenSSH for continued support and enhanced compatibility.prerequisites to be implemented if “PowerShell” is selected:
PS Remoting and WMI remoting to be enabled on each cluster node. If the configured user is non-administrator, then the below user should have privileges on WMI remoting and on Windows Services.
Add OpsrampGatewayIp to the TrustedHosts list on the target machine to allow the powershell connection from gateway to the target machine.
- To add TrustedHosts use the following command:
- To allow any host:
*Set-Item WSMan:\localhost\Client\TrustedHosts -Force -Value** - To allow a specific host:
Set-Item WSMan:\localhost\Client\TrustedHosts -Force -Concatenate -Value <IPAddress>
- To allow any host:
- To add TrustedHosts use the following command:
Setup and restart the WinRM service for the changes to reflect
- To set up:
Set-Service WinRM -StartMode Automatic - Restart using:
Restart-Service -Force WinRM
- To set up:
Windows domain user should be added to “Remote Management users” group
net localgroup "Remote Management Users" /add <user>Windows domain user should be added to “Performance monitor users” group
net localgroup "Performance monitor users" /add <user>
Following are the specific prerequisites for non-administrator/operator level users:
Enable WMI Remoting
To enable WMI remoting:
- Click Start and select Run.
- Enter wmimgmt.msc and click OK.
- Right click WMI control (Local) and select Properties.
- Click Security tab.
- Expand Root.
- Select WMI and Click Security.
- Add user and select the following permissions:
- Execute methods
- Enable account
- Enable remoting
- Read security
Enable WMI Remoting – CPU, Disk, Network
- Click Start and select Run.
- Enter lusrmgr.msc and click OK.
- In the Groups folder, right click Performance Monitor Users and select Properties.
- Click Members of tab, and click Add.
- Add users.
Enable Windows Service Monitoring
- Retrieve the user SID of the User Account from the monitored device.
- Open Command Prompt in Administrator mode.
- Run the following command to retrieve the user SID.Note: Replace UserName with the user name for the User account.
wmic useraccount where name="UserName" get name,sidExample:
wmic useraccount where name="apiuser" get name,sid - Note down the SID.(Ex. S-1-0-10-200000-30000000000-4000000000-500)
- Retrieve the current SDDL for the SC Manager.
- Run the following command which will save the current SDDL for the SC Manager to CurrentSDDL.txt.
sc sdshow clussvc > CurrentSDDL.txt - Edit the CurrentSDDL.txt and copy the entire content.
The SDDL will look like below:
D:(A;;CC;;;AU)(A;;CCLCRPRC;;;IU)(A;;CCLCRPRC;;;SU)(A;;CCLCRPWPRC;;;SY)(A;;KA;;;BA)(A;;CC;;;AC)S:(AU;FA;KA;;;WD)(AU;OIIOFA;GA;;;WD) - Update the SDDL:Frame new SDDL snippet for above SID
(A;;CCLCRPWPRC;;; <SID of User> )Example:
(A;;CCLCRPWPRC;;;S-1-0-10-200000-30000000000-4000000000-500) - Place this snippet before “S:” of original SDDL.Updated SDDL will be like this:
D:(A;;CC;;;AU)(A;;CCLCRPRC;;;IU)(A;;CCLCRPRC;;;SU)(A;;CCLCRPWPRC;;;SY)(A;;KA;;;BA)(A;;CC;;;AC)(A;;CCLCRPWPRC;;;S-1-0-10-200000-30000000000-4000000000-500)S:(AU;FA;KA;;;WD)(AU;OIIOFA;GA;;;WD) - Execute the following command with the updated SDDL:
sc sdset clussvc D:(A;;CC;;;AU)(A;;CCLCRPRC;;;IU)(A;;CCLCRPRC;;;SU)(A;;CCLCRPWPRC;;;SY)(A;;KA;;;BA)(A;;CC;;;AC)(A;;CCLCRPWPRC;;;S-1-0-10-200000-30000000000-4000000000-500)S:(AU;FA;KA;;;WD)(AU;OIIOFA;GA;;;WD)
Open ports and add user in all nodes and cluster
- OpsRamp gateway should be able to access cluster and nodes.
- Ports to be opened are 5985 and 5986.Note: By default, WS-Man and PowerShell remoting use port 5985 and 5986 for connections over HTTP and HTTPS, users should be present in nodes and cluster.
prerequisites to be implemented if “OpenSSH” is selected:
- OpenSSH must be installed and configured on the target Windows machine.
- The user should be added to all target nodes and the cluster.
- Create the same non-admin user account (either a local or domain account) on all cluster nodes.
- Add the non-admin user to the
AllowUsersdirective in thesshd_configfile on each node to permit SSH access. - Add the user to the local Hyper-V Administrators group on every node.
- Grant the user Read-Only permissions within the Failover Cluster configuration.
- Password authentication must be enabled in SSH config:
PasswordAuthentication yes- Edit
sshd_config(run PowerShell as Administrator) - Open:
notepad C:\ProgramData\ssh\sshd_config(Note: If not this location, locate the correct path for sshd_config and perform below steps) - Find the line
#PasswordAuthentication yes(orPasswordAuthentication no), uncomment it and set it to yes, then save. - Find the line
AllowUsers(or add it if missing) and set it to:AllowUsers <ssh-username> Restart-Service sshd
- Edit
- Ensures the
sshdservice startup type isAutomatic.Set-Service -Name sshd -StartupType Automatic
- Use the following command to set the OpenSSH default shell to powershell.exe on all the nodes.
Set-ItemProperty -Path "HKLM:\SOFTWARE\OpenSSH" -Name DefaultShell -Value "$PSHOME\powershell.exe"; Restart-Service sshd
- Open default ssh port 22 on all the nodes & cluster.
- The user should be added in all the target nodes & cluster.
Ensure that the provided IP address/host name, and credentials are valid and accessible for successful integration. Verify connectivity from gateway using below steps:
- Launch power shell using the
{pwsh}command. - Run the following commands to establish connection, using the details of your end device.
{$pw = convertto-securestring -AsPlainText -Force -String "<password>"}{$cred = new-object -typename System.Management.Automation.PSCredential -argumentlist "<username>", $pw}{$session = new-pssession -computername "<ipAddress>" -credential $cred -Authentication Negotiate -ErrorAction Stop}{session.state}Note: The session state should be open.
- If the session is not establishing, cross check that all of the prerequisites are met on all servers and clusters.
- If a resource is initially discovered as a Cluster and later changed to Standalone, the previously created cluster and node entities will remain, as they are not associated with the node. To reduce unnecessary noise and avoid confusion, we recommend not changing the Type from cluster to standalone.
- Make sure the cluster and subordinate node credentials are the same, and then add them to the configuration.
Configure Windows failover cluster monitoring
Click here to Configure and Install the Windows failover cluster monitoring Integration
- To select your client, navigate to All Clients, and click the Client/Partner dropdown menu.
Note: You may either type your client’s name in the search bar or select your client from the list. - Navigate to Setup > Account. The Account Details screen is displayed.
- Click Integrations. The Installed Integrations screen is displayed with all the installed applications.
Note: If you do not have any installed applications, you will be navigated to the Available Integrations and Apps page with all the available applications along with the newly created application with the version. - Click + ADD on the Installed Integrations page.
Note: Search for the integration either by entering the name of the integration in the search bar or by selecting the category of the integration from the All Categories dropdown list. - Click ADD in the Windows Fail-over Cluster application.
- In the Configuration screen, click + ADD. The Add Configuration screen appears.
- Enter the following BASIC INFORMATION:

| Field Name | Description | Field Type |
|---|---|---|
| Name | Enter the name for the configuration. | String |
| Windows Type | Select the type of Windows Server instance you are integrating:Available Options
| Dropdown |
| IP Address/Host Name | Enter the IP Address/Host Name of the Windows failover cluster monitoring. It should be accessible from Gateway. | String |
| Credentials | Select the credential associated with your Windows failover cluster monitoring account. If you want to use the existing credentials, select them from the Select Credentials dropdown. Else, click + Add to create credentials. The ADD CREDENTIAL window is displayed. Enter the following information.
| Dropdown |
| Connection Mode | Choose PowerShell or Open SSH based on the connection type with target device.Note: PowerShell connection functionality will be deprecated in upcoming feature releases. It is recommended to migrate to OpenSSH for continued support and enhanced compatibility.For more information, see Deprecation notice for PowerShell Communication. | Dropdown |
| App Failure Notifications | When selected, you will be notified in case of an application failure such as Connectivity Exception, Authentication Exception. | Checkbox |
| Connection TimeOut In Mins | Adds the feasibility to input nativebridge script execution time out in minutes. The default selection is 5 mins and the other available dropdown values are 10, 15, 20, 25, and 30. | Dropdown |
| Log File Monitoring | When selected (checked), log file monitoring is activated, allowing the system to track specific log files for changes, errors, or specific expressions. | Checkbox |
| Log File Configuration | Specifies the configuration details for the log file to be monitored. Default value:{"Name":"","Folder Path":"","File Name":"","Rotated Folder Path":"","Rotated File Name":"","Notify":[{"Monitor Type":"","Expression":"","Operator":"","Threshold":"","Severity":""}]} | String |
| Request Timeouts | Selecting this checkbox enables you to configure the timeout settings for NativeBridge connections and script execution requests made by the integration to the end device. | Checkbox |
| Connection Timeout In Mins | Select the maximum time, in minutes, that the integration should wait while establishing a connection with the nativeBridge. Default value: 10 minutes. | Dropdown |
| Connection Request Timeout In Mins | Select the maximum time, in minutes, required to process a NativeBridge HTTP call, from sending the request to receiving the response. Default value: 10 minutes. | Dropdown |
| Socket Timeout In Mins | Select the maximum allowable time of inactivity between two data packets during data exchange with the server. Default value: 10 minutes. | Dropdown |
| Script Execution TimeOut In Mins | Select the maximum execution time, in minutes, to be considered by the script. The default option is 5 minutes, with other available options being 10, 15, 20, 25, and 30 minutes. | Dropdown |
- CUSTOM ATTRIBUTES: Custom attributes are the user-defined data fields or properties that can be added to the preexisting attributes to configure the integration.
| Field Name | Description | Field Type |
|---|---|---|
| Custom Attribute | Select the custom attribute from the dropdown. You can add attributes by clicking the Add icon (+). | Dropdown |
| Value | Select the value from the dropdown. | Dropdown |
Note: The custom attribute that you add here will be assigned to all the resources that are created by the integration. You can add a maximum of five custom attributes (key and value pair).
- In the Native Types section, select the native types to be discovered.
- In the DISCOVERY SCHEDULE section, select recurrence pattern to add one of the following patterns:
- Minutes
- Hourly
- Daily
- Weekly
- Monthly
- Click ADD.
Windows type is available in two types - Standalone and Cluster.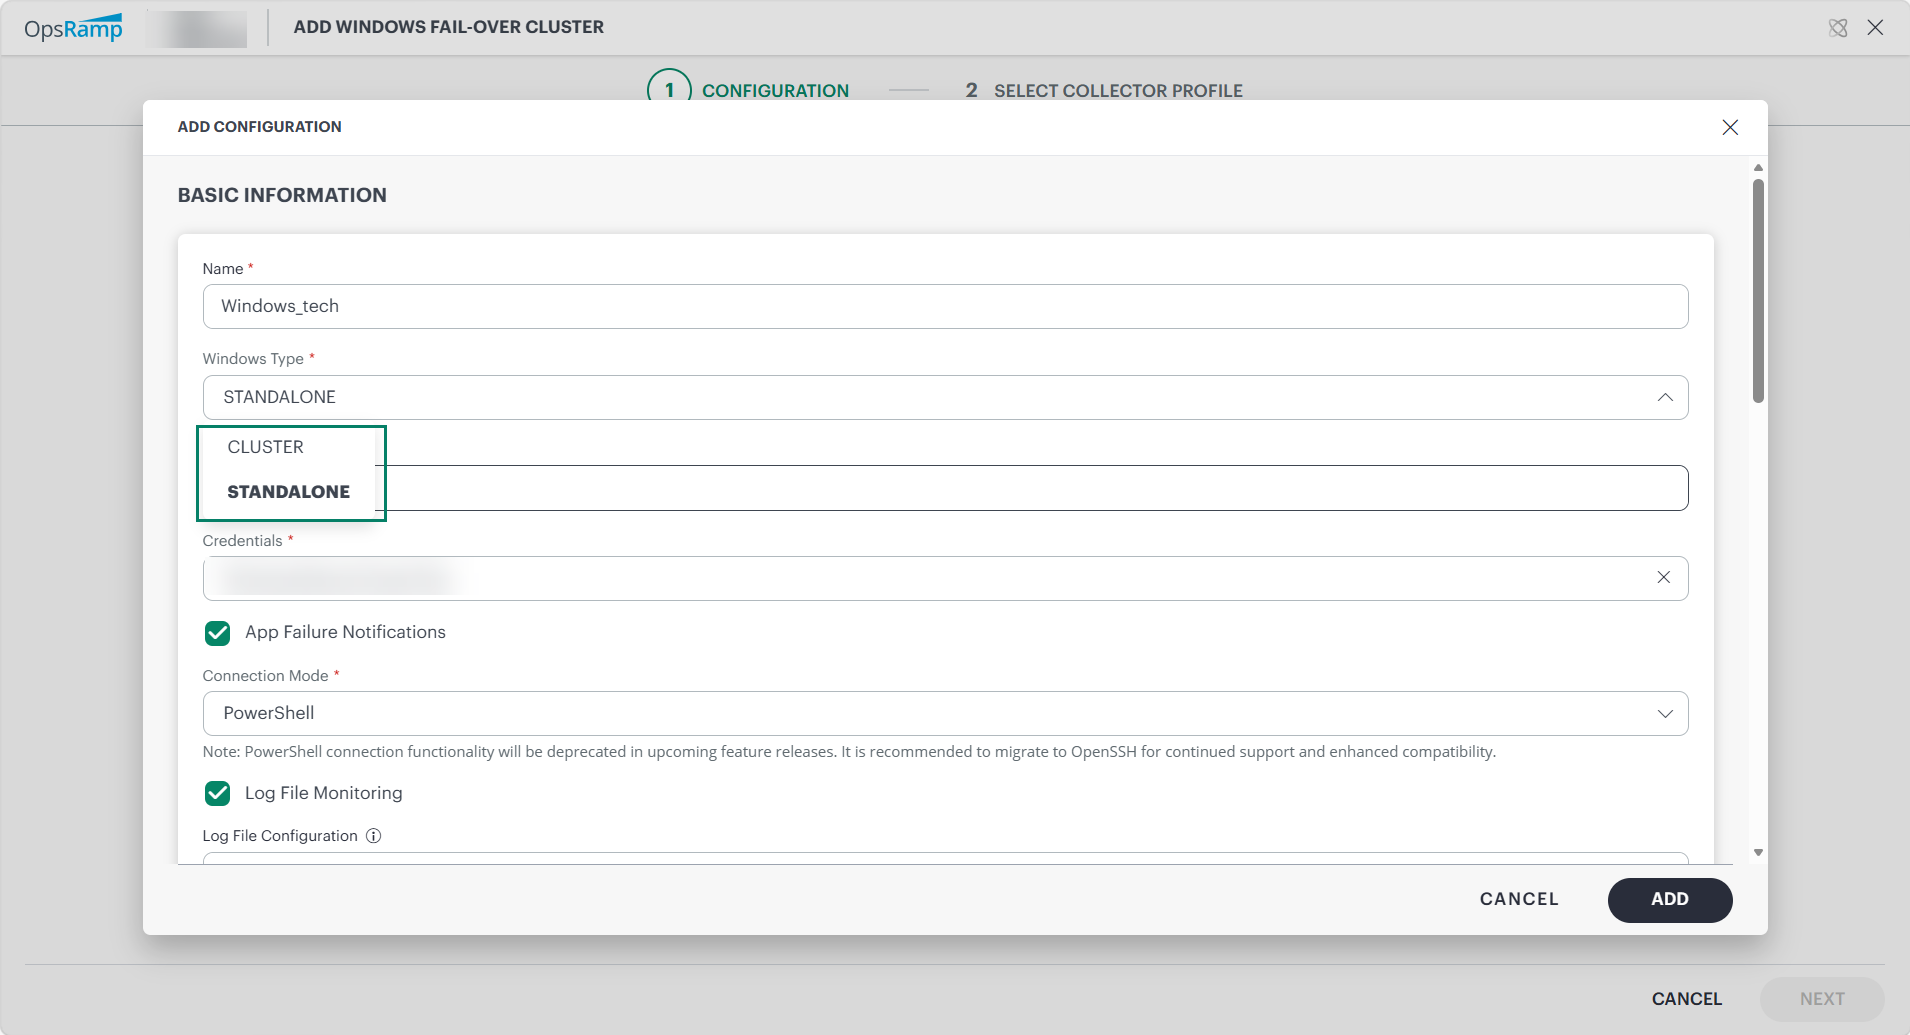
Connection Mode is available in two modes - Powershell and Open SSH.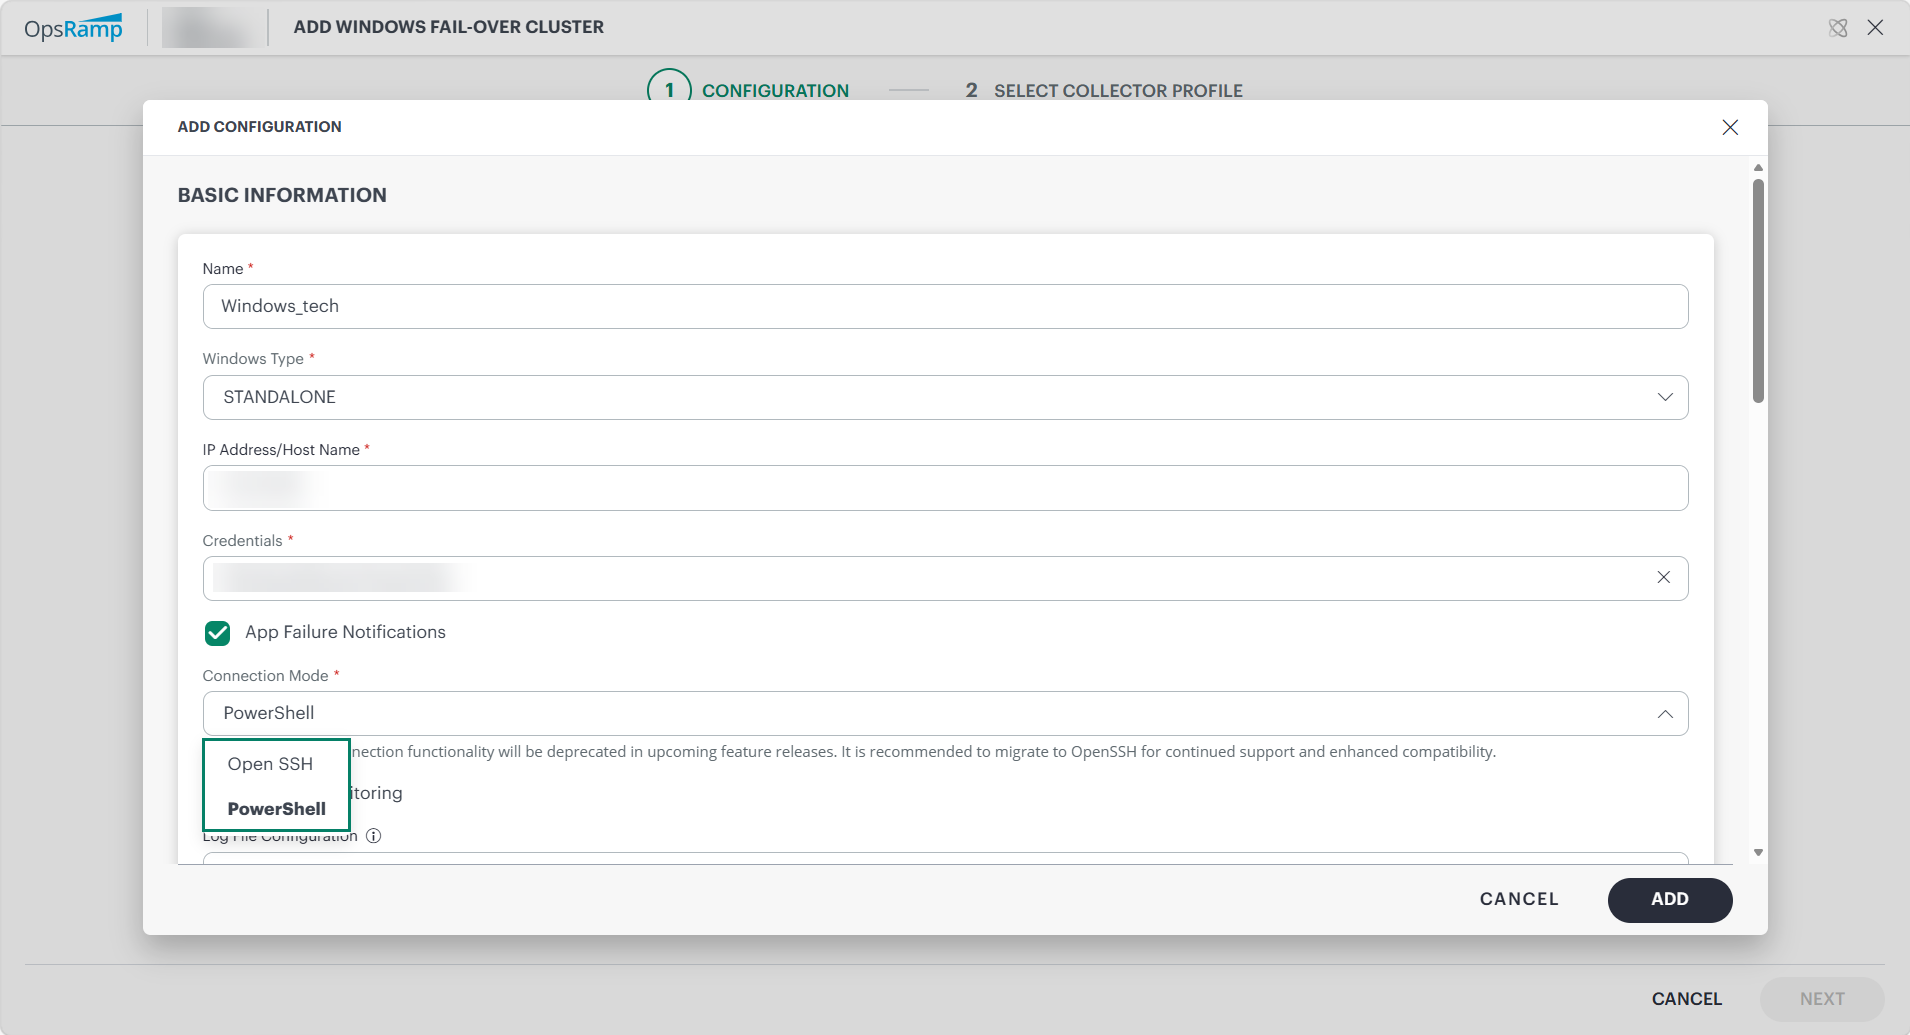
Now the configuration is saved and displayed on the configurations page after you save it.Note: From the same page, you may Edit and Remove the created configuration.
12. Under the ADVANCED SETTINGS, Select the Bypass Resource Reconciliation option, if you wish to bypass resource reconciliation when encountering the same resources discovered by multiple applications.
Note: If two different applications provide identical discovery attributes, two separate resources will be generated with those respective attributes from the individual discoveries.
13. Click NEXT.
14. (Optional) Click +ADD to create a new collector. You can either use the pre-populated name or give the name to your collector.
15. Select an existing registered profile.
- Click FINISH.
The integration is installed and displayed on the INSTALLED INTEGRATION page. Use the search field to find the installed integration.
Modify Windows failover cluster
Click here to Modify the Configuration
See Modify an Installed Integration or Application article.
Note: Select Windows failover cluster.
Discover Resources in Windows failover cluster
Click here to View the Windows failover cluster Details
The discovered resource(s) are displayed in the Infrastructure page under Infrastructure > Search > OS-High Availability > Windows Fail-over Cluster, with Native Resource Type as Windows Failover Cluster. You can navigate to the Attributes tab to view the discovery details, and Metrics tab to view the metric details for Windows Failover Cluster.
The cluster nodes are displayed under Components.