Introduction
A roster is a list of scheduled duties for organization users.
Permissions
The following permissions are required to view rosters:
| Type of user | Category | Permission Type | Permission Value |
|---|---|---|---|
| SP/MSP | Alerts | Alerts | View |
| Client | Account Administration | Administration | Administration |
| Alerts | Alerts | View |
Any one of the following permissions is required to manage (add, update, or remove) rosters:
| Category | Permission Type | Permission Value |
|---|---|---|
| ALERTS | Alerts | Manage |
| TICKETS | Incident | Manage |
| TICKETS | Service Desk | Manage |
Create a Roster
Follow these steps to create a roster:
Navigate to Setup > Account. The Account Details page is displayed.
Click the Users and Permissions tile on the Account Details page. The Permission Sets page is displayed.
Click the ROSTERS tile.
Click +ADD. The Roster Details page is displayed.
Provide the following information in the fields:
Property Description Roster Name Name of the roster Time Zone Roster time zone Description A description of the roster Click +ADD under SHIFTS. A slide-out appears.
Provide the following information to add Shift details:Property Description Shift Name Roster shift name Schedule Details Select the required schedule recurrence: - One-time
- Daily
- Weekly
- Monthly
Start Time Select Start date and time in hours and minutes. End Time Select End date and time in hours and minutes. Users Users assigned to the shift. - Select a user(s) from the Users dropdown.
Groups If you want the user groups to be roster members and if user groups are defined: - Select a user group(s) from the Groups dropdown.
Click Done. The Shift is created and displayed.

- Click Save. The roster is created and displayed in the list, on the Rosters page.
You can perform the following actions after creating a roster:
| Action | Procedure/Description |
|---|---|
| Search | To search for a roster:
|
| View and Update | To view the details of a roster, click the roster name. To update a roster:
|
| Remove | To remove a roster:
|
You can view the number of rosters on the Users and Permissions tile on the ACCOUNT DETAILS page.
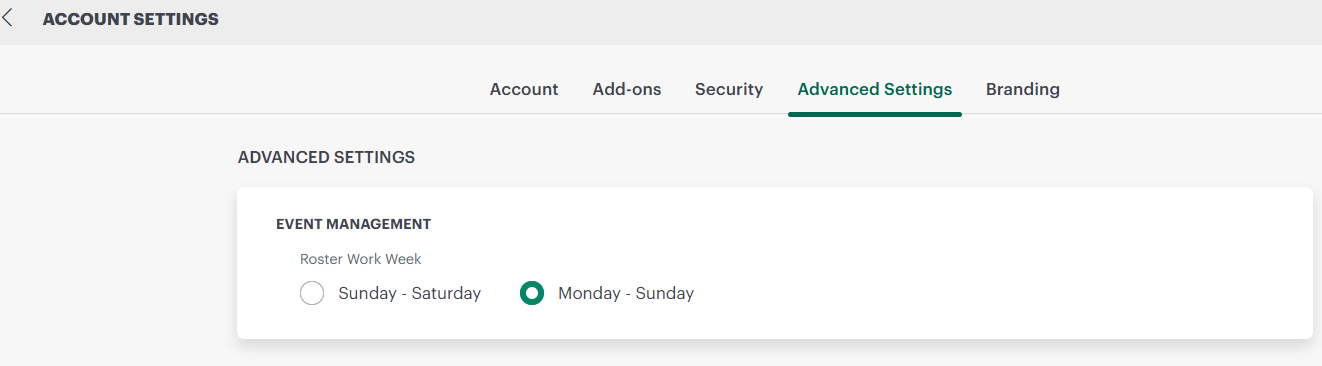
Roster Work Week
The Roster Work Week setting defines how weeks are displayed and calculated in rosters. This setting controls the start and end day of the work week used in roster views and scheduling.
You can configure the work week using one of the following options:
- Sunday – Saturday: Sets Sunday as the first day of the week and Saturday as the last day.
- Monday – Sunday: Sets Monday as the first day of the week and Sunday as the last day.
You can set the roster work week using the Work Week radio buttons at Setup → Account → Settings → Advanced Settings.
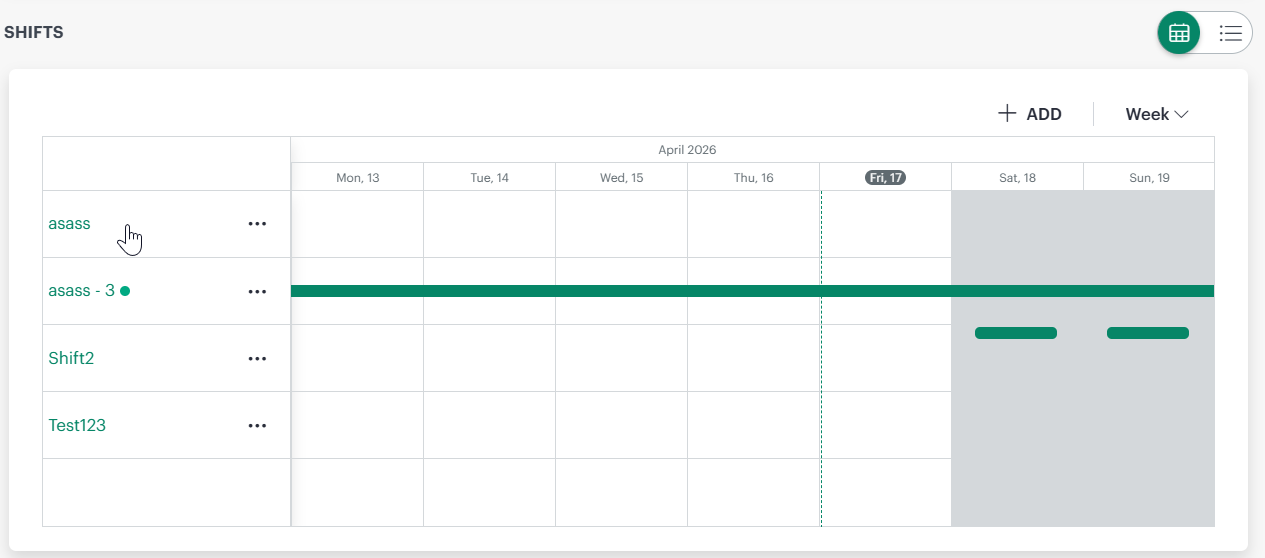
Shifts View
Shifts configured in a roster can be viewed and managed using a combined calendar and grid experience, allowing users to switch between a time‑based visual view and a detail‑oriented list view depending on their needs.
In the calendar view, shifts are displayed on a horizontal timeline:
- The Week view is now the default view when you access the Rosters list page. This provides a broader view of shift coverage across multiple days, reducing the need to switch views for daily monitoring.
- Each row represents a shift.
- This view helps users visually verify shift coverage, identify overlaps, and detect gaps across the day.
- Use the three‑dot (⋮) action menu next to a shift to view details, create a copy, or remove the shift.
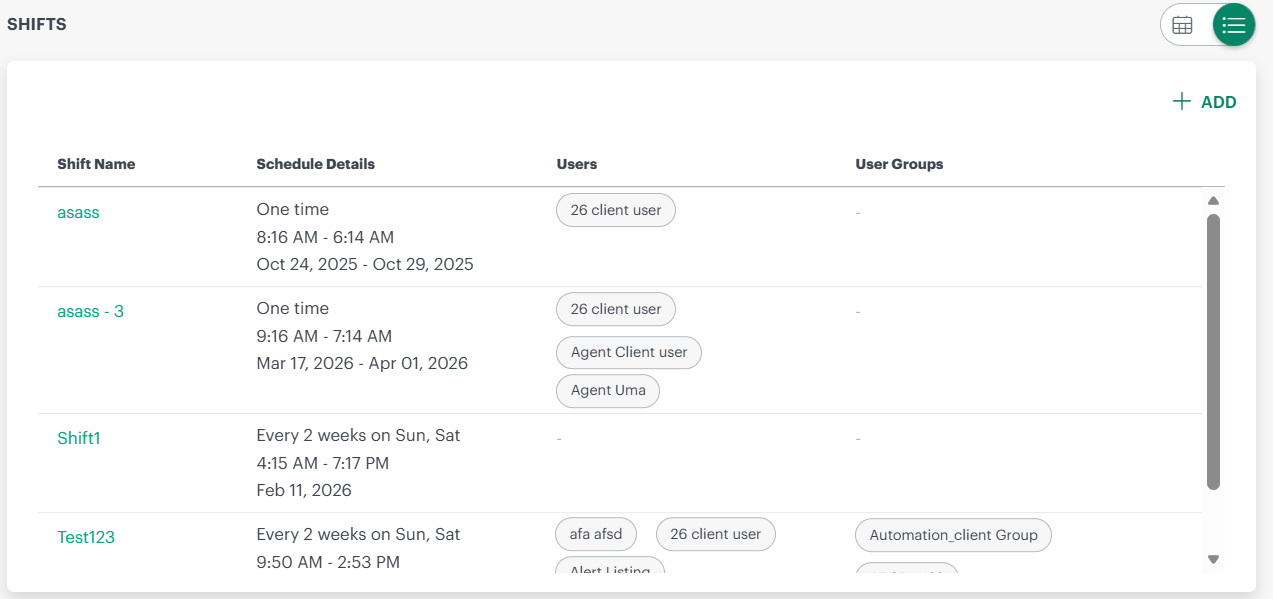
In the grid (list) view, shifts are displayed in a tabular format showing detailed information for each shift, including:
- Shift Name
- Schedule Details (recurrence type with start and end dates/times)
- Users. If more than four users are assigned to a shift, the grid displays a +more indicator. Hover on the +more displays the complete list of assigned users or groups.
- User Groups
Active Shift Indicator
- The currently active shift is visually marked in the roster.
- An Active shift indicator appears alongside the shift name in the roster details view.
- This helps users quickly identify which shift is in effect at any given time.
Add Shift
The Add Shift option allows you to define duty schedules within a roster, assign users or groups, and optionally create temporary overrides. To add a shift, click + Add from the Rosters page. The Add Shift panel opens with the following sections.
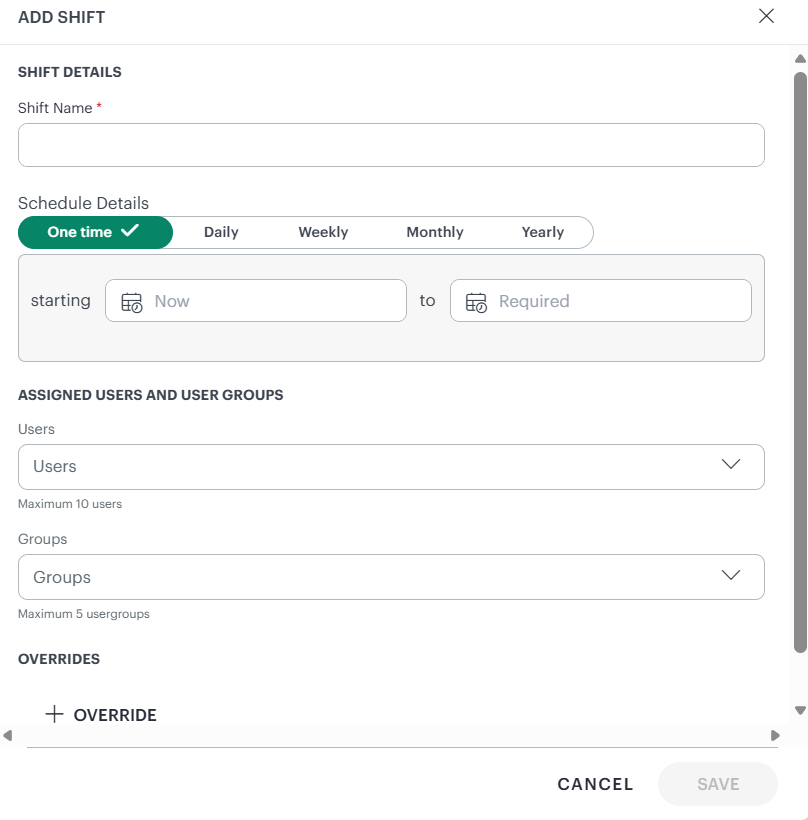
Shift Details
| Field | Description |
|---|---|
| Shift Name | Enter a unique name for the shift. This helps identify the shift in calendar and list views. |
Schedule Details
Select how often the shift occurs by choosing one of the schedule types:
- One Time – A shift that runs once for a defined time period
- Daily – A recurring daily shift
- Weekly – A recurring weekly shift
- Monthly – A recurring monthly shift
- Yearly – A recurring yearly shift
For all schedule types, specify:
- Start Date and Time
- End Date and Time
These values determine when the shift becomes active and when it ends.
Assigned Users and User Groups
Use this section to assign responsibility for the shift.
| Field | Description |
|---|---|
| Users | Select individual users to assign to the shift. You can assign up to 10 users. |
| Groups | Select user groups if group‑based assignment is required. You can assign up to 5 user groups. |
Overrides (Optional)
Overrides allow you to temporarily replace an existing shift.
- Click + Override to define an adhoc shift.
- The override shift takes precedence over the regular shift during the specified time window.
- Once the override period ends, the original shift resumes automatically.